Vietnam Welding Manpower Supplier

The best welders supplier in Vietnam- Get access to www.vnmanpower.com to be supported.

Vietnam Welding Manpower Supplier

The best welders supplier in Vietnam- Get access to www.vnmanpower.com to be supported.

Vietnam Welding Manpower Supplier

The best welders supplier in Vietnam- Get access to www.vnmanpower.com to be supported.

Vietnam Welding Manpower Supplier

The best welders supplier in Vietnam- Get access to www.vnmanpower.com to be supported.

Vietnam Welding Manpower Supplier

The best welders supplier in Vietnam- Get access to www.vnmanpower.com to be supported.

Showing posts with label tig welding tips. Show all posts

Thursday, January 7, 2016

14 Tig Welding Aluminum Tips for Higher Weld Quality

Fantastic advice that will help your welders a lot with Tig welding aluminum


14-Tig-Welding-Aluminum-Tips-for-Higher-Weld-Quality-1

Related reading:
Tig Welding Aluminum Tips That Will Help You Tremendously
21 Tig Welding Tips That You Need to Keep in Mind

1. Clean the aluminum off using a wire brush or a scotch brite pad. Use a brand-new brush. And for the best results, use a stainless wire brush. Don’t use the stainless steel brush on anything but aluminum. The same goes for the scotch brite pad, not used on anything but the aluminum. A contaminated brush can make an aluminum weld considerably weaker.

2. Basically, there are 3 brushes – one for steel, one for stainless and the other is for aluminum. Never ever mix them up.

3. Get as much practice as possible. Aluminum, indeed, takes a while to get a feel for.

4. If you suspend your plates off the table, it sure will make it easier to get full penetration. Try putting blocks underneath your plates, leaving one inch of the plate hanging over on each side of the joint.

While suspending the plates off the table does help with full penetration, it also makes it much easier to blow holes. Practically, you really need have the skill to manipulate the metal well enough to avert from blowing a hole in your work-piece and generate the full penetration condition at the same time.

5. Aluminum requires lots of heat to weld. For example, 1/8” aluminum open corner joint asks for a machine setting of around 130 amps using AC current. The pedal should be ¾ of the way down during your welding. Zero to ½ pedal will enable you to light the arc without melting material and trail off the arc gently. Three quarter to wide open allows the operator to have amperage in reserve.

6. When using AC current on aluminum, the material will get shiny as it’s ready to accept a filler rod. If the material isn’t shiny, it won’t accept filler metal. That’s why just watch the area closely underneath the tungsten rod until you see it become shine.

For exception, DC welding aluminum with the helium shield pool doesn’t change color; it sinks.

7. When you add your rod to an aluminum weld, the pool will rise. Take this into consideration when you position the tungsten over the part; otherwise, your weld will rise up and contaminate the tungsten electrode.

8. When welding aluminum, if you do not see reinforcement above your plate, one of below two things is occurring:
You are adding in insufficient rod
The material is gotten too hot, and your weld has sunk. This is called burn-through.

9. Rod to torch angle is very important. Heat will reflect off your part and melt the rod if you aren’t aware of it. Just slide rod in under heat. Rod needs pushing into the pool, but not drawing in by the arc heat; or else, you won’t achieve uniformity. This applies to any process that you have to manually feed in a rod with your hand. If it can be avoided, rod and torch angle should never be the same.

14-Tig-Welding-Aluminum-Tips-for-Higher-Weld-Quality-2
Rod to torch angle is critical.
10. Keep the arc length as short as possible. The arc length is the distance between tungsten and work-piece. The more stable your hand is, the closer you can get. Different arc lengths can be applied for different materials.

11. Tungsten profiles would change arc characteristics:
Long taper -> Heat is concentrated in small area.
Decreasing taper -> Arc will spread out more.
Round -> Heat will flare out (for AC current on aluminum).

12. The smaller the rod is, the harder it is to feed. Start welding with larger rods (3/32” or 1/8”, etc.)

13. Some alloys of aluminum do not weld or bend. Know what you’re welding. Do your homework on aluminum alloys by searching information on the Internet or the like. 2024 and 7075 aren’t weldable. 5052, 3003, 1100 are known as bendable soft alloys. 6061, 7075 will bend, but not in the tight radius. Just research out your materials.

Nice read about a new automotive welding technology that creates strong bonds between metals that are formerly ‘un-weldable’:
New Automotive Welding Technology Expected to Create Much Stronger Bond

14. When welding on aluminum casting, bear in mind those things:
Grind off sand from the rough castings. There are available grinding wheels for 4- 1/2” and larger grinders specified for grinding aluminum.
Dirty or oily castings need special care. If possible, you can plasma cut out a crack. This would clean out the oil in the crack. Drill holes at the ends of cracks; otherwise, they will keep happening after the repair is made.
Clean the surface using alcohol or similar cleaner. Carefully heat the area with an oxy-acetylene torch for cooking out the oil. Go over the crack with a Tig torch with low heat. Use a small tungsten electrode. Don’t add welding rod. Every time you go over the aluminum, it should get cleaner. You will see the black discolor aluminum at first. Just weld, grind, weld, grind. After all, the aluminum will become shiny, then you can weld with the rod and larger tungsten.
You can utilize sanding discs on aluminum for metal finish. Spray WD40 on the disc and the part to prevent it from loading up.

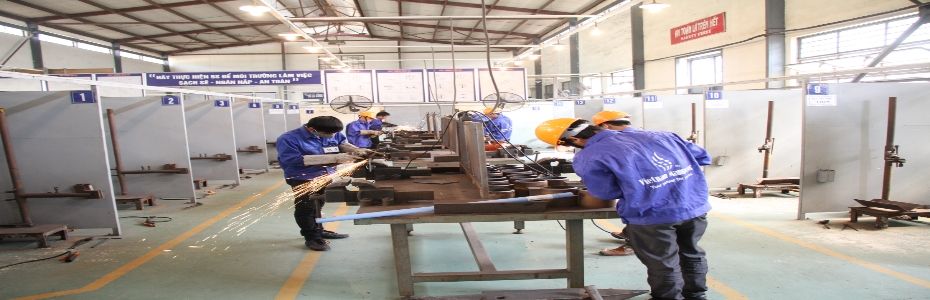
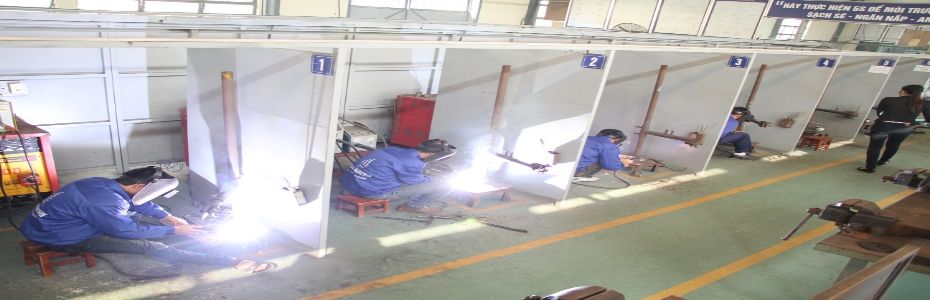
Above is helpful advice collected by Vietnam Manpower Service and Trading Company (VMST) - one welding manpower supplier from Vietnam. Do you have any tips to share? We are happy to hear them!

Thursday, November 26, 2015

21 Tig Welding Tips That You Need to Keep in Mind

There are many ways to control the arc, puddle, final outcome of your weld. Here are 21 Tig welding tips that are essential to keep in mind. 

You may like reading:

21-Tig-Welding-Tips-That-You-Need-to-Keep-in-Mind

More than Mig and arc welding, Tig welding asks for lots of more practice to be proficient in. Patience is a must. Each time you pick up a torch, are you excited? It is a challenge and really gratifying when everything is fine. 

There are many ways to control the arc, puddle, final outcome of your weld. Here are 21 Tig welding tips that are essential to keep in mind. 

1. Always Tig weld using the minimum power - When you start practising welding on thin sheet metal, say 1.5 mm thick. Without any other information on the metals, their thickness and others, the minimum current that will just sustain a melt pool is a good starting point. Tig welding is penetrative – getting that penetration is much in the technique and just secondarily on the power input.   

2. Cleanliness is a must - Unlike other types of welding, Tig welding requires a very clean surface to create a clean arc and nice welds. Make sure you clean the work surface really well before you weld. For aluminum and stainless, you are recommended to use a dedicated stainless brush for each type of metal you are welding on. You will find the more time you spend cleaning your work area before welding, the better final outcomes will be. 

In case you are interested in:

3. Choose the correct Tungsten - Depending on the surface you’re working on, you may need change out your Tungsten. Conventionally, green Tungstens are applied for aluminum and red for steels, but some people favor the red Tungstens across the board. You are suggested to try the ‘conventional’ use of each before making a decision. Also, make sure you use the right thickness of Tungsten. If it is too large, you will have to use too much heat to strike an arc and could risk burning or warping through the work-piece. Using too small of a Tungsten, you can damage it from being overheated. 

4. Touch the Tungsten tip, regrind - If you touch the tip into the puddle, you must regrind it. Otherwise, the arc will wander off course and the weld won’t be as nice and smooth as it should be. 

5. Keep up productivity - Make sure you avoid being distracted and interrupted. Keep spare, ready-ground Tungstens. Have all the pieces you plan to weld cleaned and ready. Also, keep lots of extra filler rod within arm’s reach. 

6. Grind your Tungsten correctly - Make sure you are grinding the tungsten correctly. Many beginners don’t do it right and have to accept the unpleasant results. Make sure you grind the tungsten length-wise and as even as possible. If you are not using a Tungsten sharpener, use a dedicated bench grinder to grind Tungstens on. If you use an all-purpose grinder, your Tungstens can be contaminated.

For those who are interested in:

7. 2º Tungsten electrodes are mildly radioactive. When grinding, wear a respirator.

8. Shielding gases for Tig are:
100% Argon – the most common gas
75% Argon/25% Helium – the next hottest gas
75% Helium/25% Argon – the hot gas. Higher percentage of helium in the gas can result in arc starting problems.
100% Helium – the real hot gas. Difficult to start arc. 

9. Your gas should be argon (not mixed) for aluminum and steel, and should be set between 15-20 cfh. If you set it too high, it will blow away from the weld. 

10. The bigger the rod is, the easier it is to feed. Use larger diameter rods (from 3/32” to 1/8”) when learning Tig if possible. 

For your information:

11. Rod angle and torch angle shouldn’t be the same. It’s because the heat will bounce off of your 
part and melt your rod before you want it to. 

12. If a ball forms on the end of the rod when welding, you are doing something wrong. The problem can be improper rod to torch angle or not being aggressive enough. When feeding rod, make sure you push the rod into the welding pool.

13. Mig and Tig wire are the same. That is, one can use Mig wire to Tig weld just in case.

14. Aluminum takes plenty of heat to weld. Don’t be afraid to raise the welding current. Welding with a ‘hot’ machine will allow you to raise welding speed. The ‘hot’ machine cum fast travel speed means less input of heat into the part and reduces the possibility of distortion and/ or burn-through. 

For your information:

15. Be at the welding temperature with foot pedal depressed ¾ of the way. The ¼ pedal you have left is in reverse. That technique enables you to gently trail off the arc at the end of your weld. Indeed, ending the arc suddenly can make the weld crack.

16. Weld stainless steel using gas lenses. The screen in the lenses allows much better gas coverage of welds. You can use gas lens to weld all materials. They also enable you to stick your Tungstens up to 1” out of the cup by increasing the gas flow. The typical gas flow rates are about 15 to 20 cfh.

17. Torch angle impacts penetration. The more vertical the torch is, the more arcs are directed into the part. 

18. Wear thin gloves on your rod feeding hand. You need maximum feel to properly feed the rod. Learn to feed rod out with your ‘pencil’ fingers and thumb.

19. Get filler metal charts that will let you select correct rods for whatever materials you’re welding.

20. Let the Tungsten stick out of cup 1/4” to 5/16” when you weld high-amp aluminum. Otherwise, heat will radiate from the cup to the Tungsten and lower output, especially if the orifice is too small. 

21. Put a glove, wood, or something non-conducting on your welding table to protect your arms from shocking hazard. Sweat can worsen this problem. Rest your torch holding hand on a steady object for better results.  

Helpful information that you may like reading:

Those are some basic tips for Tig welding. If you have any tips to share, don’t hesitate to leave them in the comment. 

Thursday, November 12, 2015

All around Tig Welding Process with Detailed Explanation

This article gives an overview of Tig welding process with explaining all minute details. So you can expect a better grip of this process after finishing this read. 

All-around-Tig-Welding-Process-with-Detailed-Explanation-1

Tungsten Inert Gas Welding (TIG) is known as one of the two types of gas shielded arc welding process (the other one is Metal Inert Gas Welding (MIG)). Also, in the dual-shield mode of Flux Core Arc Welding (FCAW), a gas supply is added along with self-shielding of core flux. That’s why FCAW is also listed in the gas shield arc processes. The principle of Tig welding process is based on the production of arc using the high melting and non-consumable tungsten electrode. That reasons why this process is referred to as tungsten arc gas-shielded (TAGS) (also, argon arc welding, tungsten inert gas, gas tungsten arc welding). Gas shielding is applied to protect the weld puddle from atmospheric contamination. Because those gases are transparent, the weld puddle is made visible to the welder. Tig process features:

Distinct features

In Tig welding, no flux is used, then you don’t have to fear about corrosion due to flux entrapment. 
No slagging, which helps with elimination of post weld cleaning.
Because there is no spark and fumes, you can produce sound welds with perfect definition.

Non-consumable tungsten electrodes are used to produce an arc of substantial high temperature that helps melt the work metal. Air is driven out owing to the envelope of inert gas that averts the weldment, tungsten electrode and heat affected zone (HAZ) from oxidation. Unlike Mig welding, tungsten electrode isn’t consumed; rather, it gives arc to melt the additional filler metal. Filler metal is fed to the weld puddle. 

Normally, there are 2 modes of Tig welding: semi-automatic, automatic. In semi-automatic, the operator has to configure the current and gas flow settings, and then manually deal with the torch and filler road. Still, in automatic mode, the operator sets the speed of travel, arc length, gas flow rate, filler rod position, and then observes the operation and controls where it’s needed. 

First, Tig was introduced to weld magnesium to mitigate rapid corrosion problems. The technique was successfully applied to attain best results with no consequent corrosion. This process was introduced with distinct characteristics as opposed to other arc processes. For shielding, the gas flow rate can be controlled by flow rate and manifold. During welding, the gas flow not just shields the weld and filler metal but protects the torch. There is also a gas delay feature allowing gas to flow in the preset time, after the current has been shut off. 

Tig is used in both welding ferrous and non-ferrous metals with a wide range of thickness not beyond 8mm. Both AC and DC current supplies are used with the range from 15 to 350 amps. Using small diameter electrodes and suitable current range, this process is also applied in repair work and new manufacturing. Though it’s relatively slower than other arc processes, it creates high-quality welds with perfect definition in carbon steel, stainless steel, aluminum. The DC source is used for welding stainless steel, carbon steel, nickel, copper alloy. Meanwhile, AC source is suited for welding aluminum and its alloys. 

For those who are interested in:

Equipment

Tig torch

Different sizes of torches are available for different current-carrying capacities. The assembly of Tig torch includes a switch for different welding operations. The torch casting holds electrode and gas nozzles. 

Additional features

Water cooling system
As you weld with high amperages, cooling is required. A water cooling system is installed where water is circulated through the torch to keep it cool. In the past, systems were connected with additional cooling system, but nowadays, it’s installed inside the modified equipment. The water flow is controlled either by torch or by foot pedal.

DC suppression
In aluminum and magnesium alloy welding, the surface oxide formation is the major concern. In aluminum welder, because the arc is formed between tungsten and aluminum, chances are that AC is converted to DC. That’s why a DC suppressor is employed to avert the conversion from AC to DC mode. 

Contactor
It puts the arc to be extinguished when delay shielding is needed for cooling purposes. This way, it not just protects weld but give means of safety to your welder. This process is also controlled by foot pedal and torch. 

Arc initiation
Arc initiation by touching the electrode with base metal can induce serious contamination problems and arc unstability. Clearly, tungsten inclusion can lead to localized hard spots. The transfer of the base metal to tungsten electrode can also induce contamination and consequently unstabilize the arc. In order for the electrode not to touch with your work piece, high frequency spark is created, which causes some ionization in spark gap. The current continues to flow as a result of this ionized spark gap. This feature also helps enhance the life span of tungsten electrode. Below are arc initiation methods that are often used in modern equipment:

   • Scratch start
In this method, the electrode is brought down to work piece, and gently scratched for arc initiation. As stated above, the slight contact can lead to the contamination problems. This method is taken only in the applications that contamination isn’t serious.

   • Lift up
Here the electrode is brought down to contact with work piece at the initial point of welding. Torch switch is pressed, creating contact, and still no current is generated. When the electrode is lifted up, the current continues to flow and quickly increase to the pre-set value. This rapid rise is referred to as slope up.

   • Slope up
Slope up is the rapid increase of welding current to the pre-set current on the power source. Using the switch, the welder can set the time required for the increase of current to the selected amperage. This feature makes less contamination and reduces the risk of burning thin sheets at the initial point of welding.

   • Slope down
Slope down is the gradual drop of welding current to zero. It is defined as the time taken to decrease the current until the arc is extinguished. This feature is used for filling the crater at the end of the weld. Often, this function is operated with the support of torch switch and foot pedal.  

In case you are interested in:

Electrode used in Tig welding

Tungsten is the high melting point metal around 3000 degree Celsius. In the Tig welding process, pure tungsten with its best thermal and electrical conductivity is employed. Nowadays, alloyed tungsten with 1-2% thorium and zirconium is used for better arc stability and enhanced electrode life. There are 2 types of alloyed tungsten electrodes: thoriated electrodes for DC mode and zirconiated electrode for AC mode. Also, noticeably, electrode diameter is determined by current polarity.

Electrode grinding is one of main concerns in attaining consistent performance in welds. Electrodes are ground as per application. There are 2 ways of electrode grinding: manual grinding and machine grinding. Machine grinding leads to consistent grinding. Care must be taken while manual welding. 

As with electrode shape, electrode is often ground to the required vertex angle. For the DC usage, the electrode is ground to the length of 1-3 x the diameter of electrode.

Point length of electrode = 1-3 x diameter of electrode

This way, the lower the current is, the longer the point length will be. Electrodes are normally available with the diameter range of 0.8, 1.6, 3.2, 4.0 and 6.4 mm.

For the AC usage, the electrode side is ground to 45 degree, remaining the front side to be flat. This offers the spherical shape as shown in the below image.

All-around-Tig-Welding-Process-with-Detailed-Explanation-2

Electrode installation in torch is simple. The electrode is installed in torch, and held tightly thanks to grippers known as sockets. They can grip and hold electrodes of various diameters.

Gas nozzles

Those nozzles are made of high temperature ceramic materials for bearing high welding temperature. As stated above, some nozzles are equipped with water cooling system. Only the right choice of gas nozzle size gives better protection of weldment, weld pool as well as filler material. Different shapes of nozzles are available for different types of jobs. Small-size nozzles are available for confined areas while long shapes are available for deep-groove joints.

Gas lens

Gas lens are offered to prevent the turbulence of gas flow. Poor gas flow may not give quality shielding service; that’s why gas lens are used to give consistent and smooth gas flow, well shielding the weld puddle. Thanks to gas lens, electrode extension can also be attained for access to complicated areas.

Monday, August 10, 2015

Tig Welding Aluminum Tips That Will Help You Tremendously

Helpful tips for Tig welding aluminum that you can refer to for higher weld quality.

The outside corner joints is a crucial part of your project whether it’s Tig welding aluminum tanks, overflow reservoirs, fuel cells, or expansion tanks for supercharger.

Often, the outside corner welds and the press brake bends contribute to a well-built tank. 

Below are tips for putting together aluminum tanks that can be really helpful for your welding work.

Tips for Tack welding aluminum without filler metal 

Often, this kind of tack welding would be finally cracked. Still, if you notice corner tack welds in this video, the sharp corner of the end caps along with the little radius in the bend would give a good way to tack without filler metal since it is the corner that becomes filler metal.

You know, most of those in welders jobs work by themselves when building a project. Then a lot of time, they have to weld without filler metal. While it is not encouraged in most books, you know, books don’t weld. That’s why it’s useful to seize how to tack weld aluminum this case.

You can sparingly do it. You may get 1 or 2 tack welders without filler metal for holding the part. Meanwhile, get some more tacks with filler rod. Even then you should return to add the filler road to the first tack welds since aluminum tack welds can be not strong enough.
Tig-Welding-Aluminum-Tips-That-Will-Help-You-Tremendously-1
Tack weld aluminum without filler

Transformer Vs. Inverter

In this project, Roy applied an Inverter Tig welder with the frequency set at 120hz or so.

For transformer Tig welders – older technology, the frequency is normally 60hz.

120hz sure focuses more on the arc, 60hz works nicely, too, for such a job.

It may be a different story if we were talking about aluminum at .030’’ thick.

But for aluminum at 3.2 mm (.125’’), the ball on the electrode tip and the wide arc cone, indeed, can help melt the outside corner joint’s corners.

In case you're interested in:
How to Tig weld
Examples of Tig welding

Helium?

Just about every time Roy welds the aluminum at 11 ga thick or more, he likes some addition of helium. 

Jody Collier, his friend, used a mixture of argon and less 10% helium. Still, such a small percentage can make a significant difference.

While Roy employed the Tig inverter, Jody Collier used the Lincoln Tig 175 for arc shots in the video.

And you can hear the difference in arcs due to different frequencies set though, the finished welds turned out truly similar.
Tig-Welding-Aluminum-Tips-That-Will-Help-You-Tremendously-2
Aluminum Tig Outside Corner Beads
(Above information and video are taken with credit from Jody Collier.)